At AgentPrint, our goal is to assist real estate professionals in looking their best. We’re committed to translating complicated design themes into easy-to-grasp concepts. Let’s focus today on the three elements that can transform any customise any template in our online design tool – the safe zone, trim, and bleed lines. These may sound like tech-speak, but we can simplify them.
Consider the ‘safe zone’ as a border protecting your design; ‘trim’ is like precise haircuts for your work’s edges; ‘bleed’ lets your design breathe by spilling slightly over the borders. With our tools and technology, we ensure our friends in real estate can tackle these with ease.
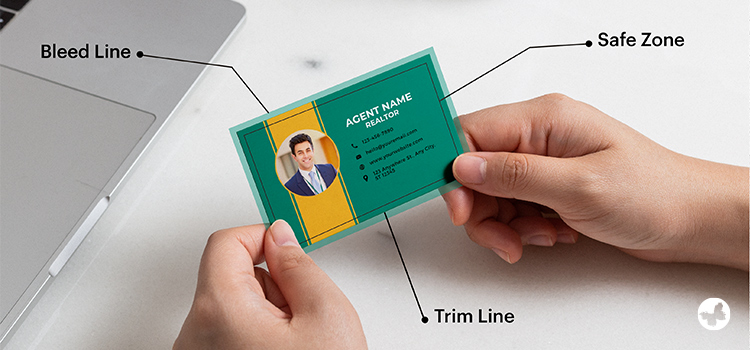
The Basics: Safe Zone, Trim and Bleed Lines

In the bustling world of real estate, we understand how each precious second counts. You’re busy showing properties, closing deals, and making dreams come true. However, investing a moment to comprehend some crucial aspects of design could undoubtedly make a world of difference to how your real estate signs and prints look. And yes, we’re here to make this understanding simpler, faster, and better!
What is a Safe Zone?

Think of the safe zone as a comfortable guard surrounding your design. It’s like a protective shield ensuring nothing crucial—be it logos, text, or important components of your designs—gets accidentally sliced off during the cutting process. Envision nesting your key elements here, safe and sound within this boundary. With AgentPrint’s free online design tools, understanding and implementing these crucial printing elements becomes effortless for our real estate professionals.
Read More: 9 Tips for Designing the Best Real Estate Card
The Trim Line, Explained
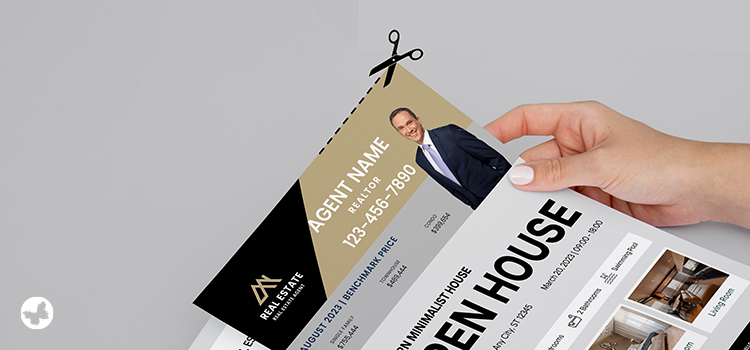
Consider the trim line as the final border for your design. Just like trimming the edges of a beautiful painting, this line indicates where the cutting process will take place. It sets the final size of your print or sign. Like a frame outlines a picture, anything outside this line is trimmed away, making your design fit perfectly within its confines. This helps to clean up and fine-tune your design, bench-marking your real estate materials’ final shape and size.
Getting to Know the Bleed Line
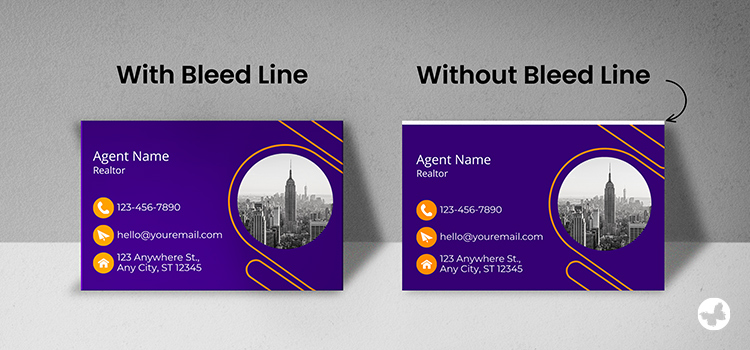
Think of the Bleed Line as an additional safety net for your design. It’s like an insurance cover against any small mistakes in the cutting process. Anything stretched to this line is printed beyond your design’s final size. This ensures that if any slight errors occur while cutting, they’ll reveal colour, not an unplanned white border. By understanding this concept, at AgentPrint, we’ve made it easier for our real estate colleagues to create appealing prints and signs that look as precise and professional as their services.
Grasping these ideas is straightforward, yet their impact on your designs is huge. Imagine them as invisible protectors, keeping your prints and signs looking sharp and professional each time. Applying these principles enhances the visual appeal and effectiveness of your signs and prints.
Why They’re Necessary: Problems They Prevent
We emphasise the importance of these design features because they stop commonplace problems. Imagine your text getting too close to the edge, we risk losing vital details during the cutting process. Without the bleed area, even a slight error in cutting could result in unsightly white borders around your printed material. By sticking to these principles, we’re safeguarding our commitment to high-standard work – giving you top-tier products, at cost-friendly prices, with the added bonus of speedy turnarounds. Our goal is to keep these issues at bay, ensuring your real estate prints and signs always show off your professionalism.
Implementing These Principles into Your Designs
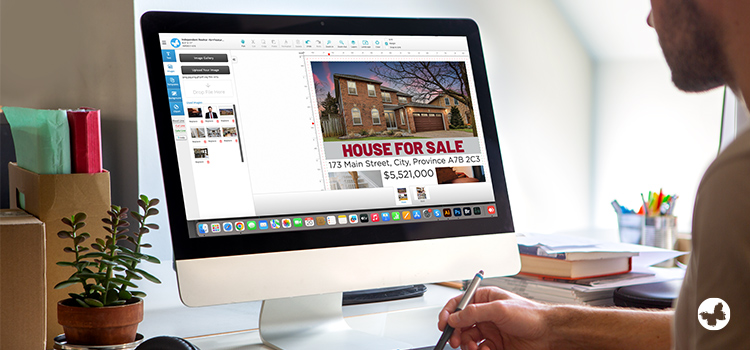
Now that you have a good understanding of these terms, let’s see how you can incorporate them into your design process using our advanced design tool.
Using the Safe Zone in the Design
When designing your materials, make sure that all essential elements such as your logo, text, or call-to-action are placed within this zone. This ensures that these important parts will not be cut off or cropped out.
Considering the Trim Line in the Design
It is crucial to keep an eye on the dimensions of your design. The trim line represents the final size of your material. None of your key information should extend beyond this boundary, as it may be trimmed off during the production process.
Using the Bleed Line in the Design
To avoid any unprinted areas on your final piece, it is recommended to extend your background colours or images beyond the trim line, up to the bleed line. This allows for minor shifts in the cutting process without leaving any blank spaces.
By understanding and utilising these principles effectively, real estate agents and brokers can expedite their journey toward creating professional and visually appealing prints that will impress their clients.
Conclusion
Understanding the safe zone, trim, and bleed lines is not complicated, but applying them in the design process with precision ensures that your final product is perfect every single time. It’s one more way that we’re meeting the needs of our real estate pros with ease, speed, and high quality. At AgentPrint, we’re all about you, and we’re committed to helping you succeed. Happy customising!